How to Spot Common Coating Defects: A DIY Guide


Applying a coating to a surface is more than just a protective measure; it enhances appearance and durability. However, even the most skillful DIY enthusiast can encounter common coating defects. Learning to identify these issues early can save time and resources.
Understanding Coating Defects
Coating defects can occur for various reasons, such as improper application, unsuitable environmental conditions, or poor surface preparation. By recognizing these defects, you can take corrective actions to maintain the integrity of the coated surface.
Common Coating Defects
The most prevalent coating defects include:
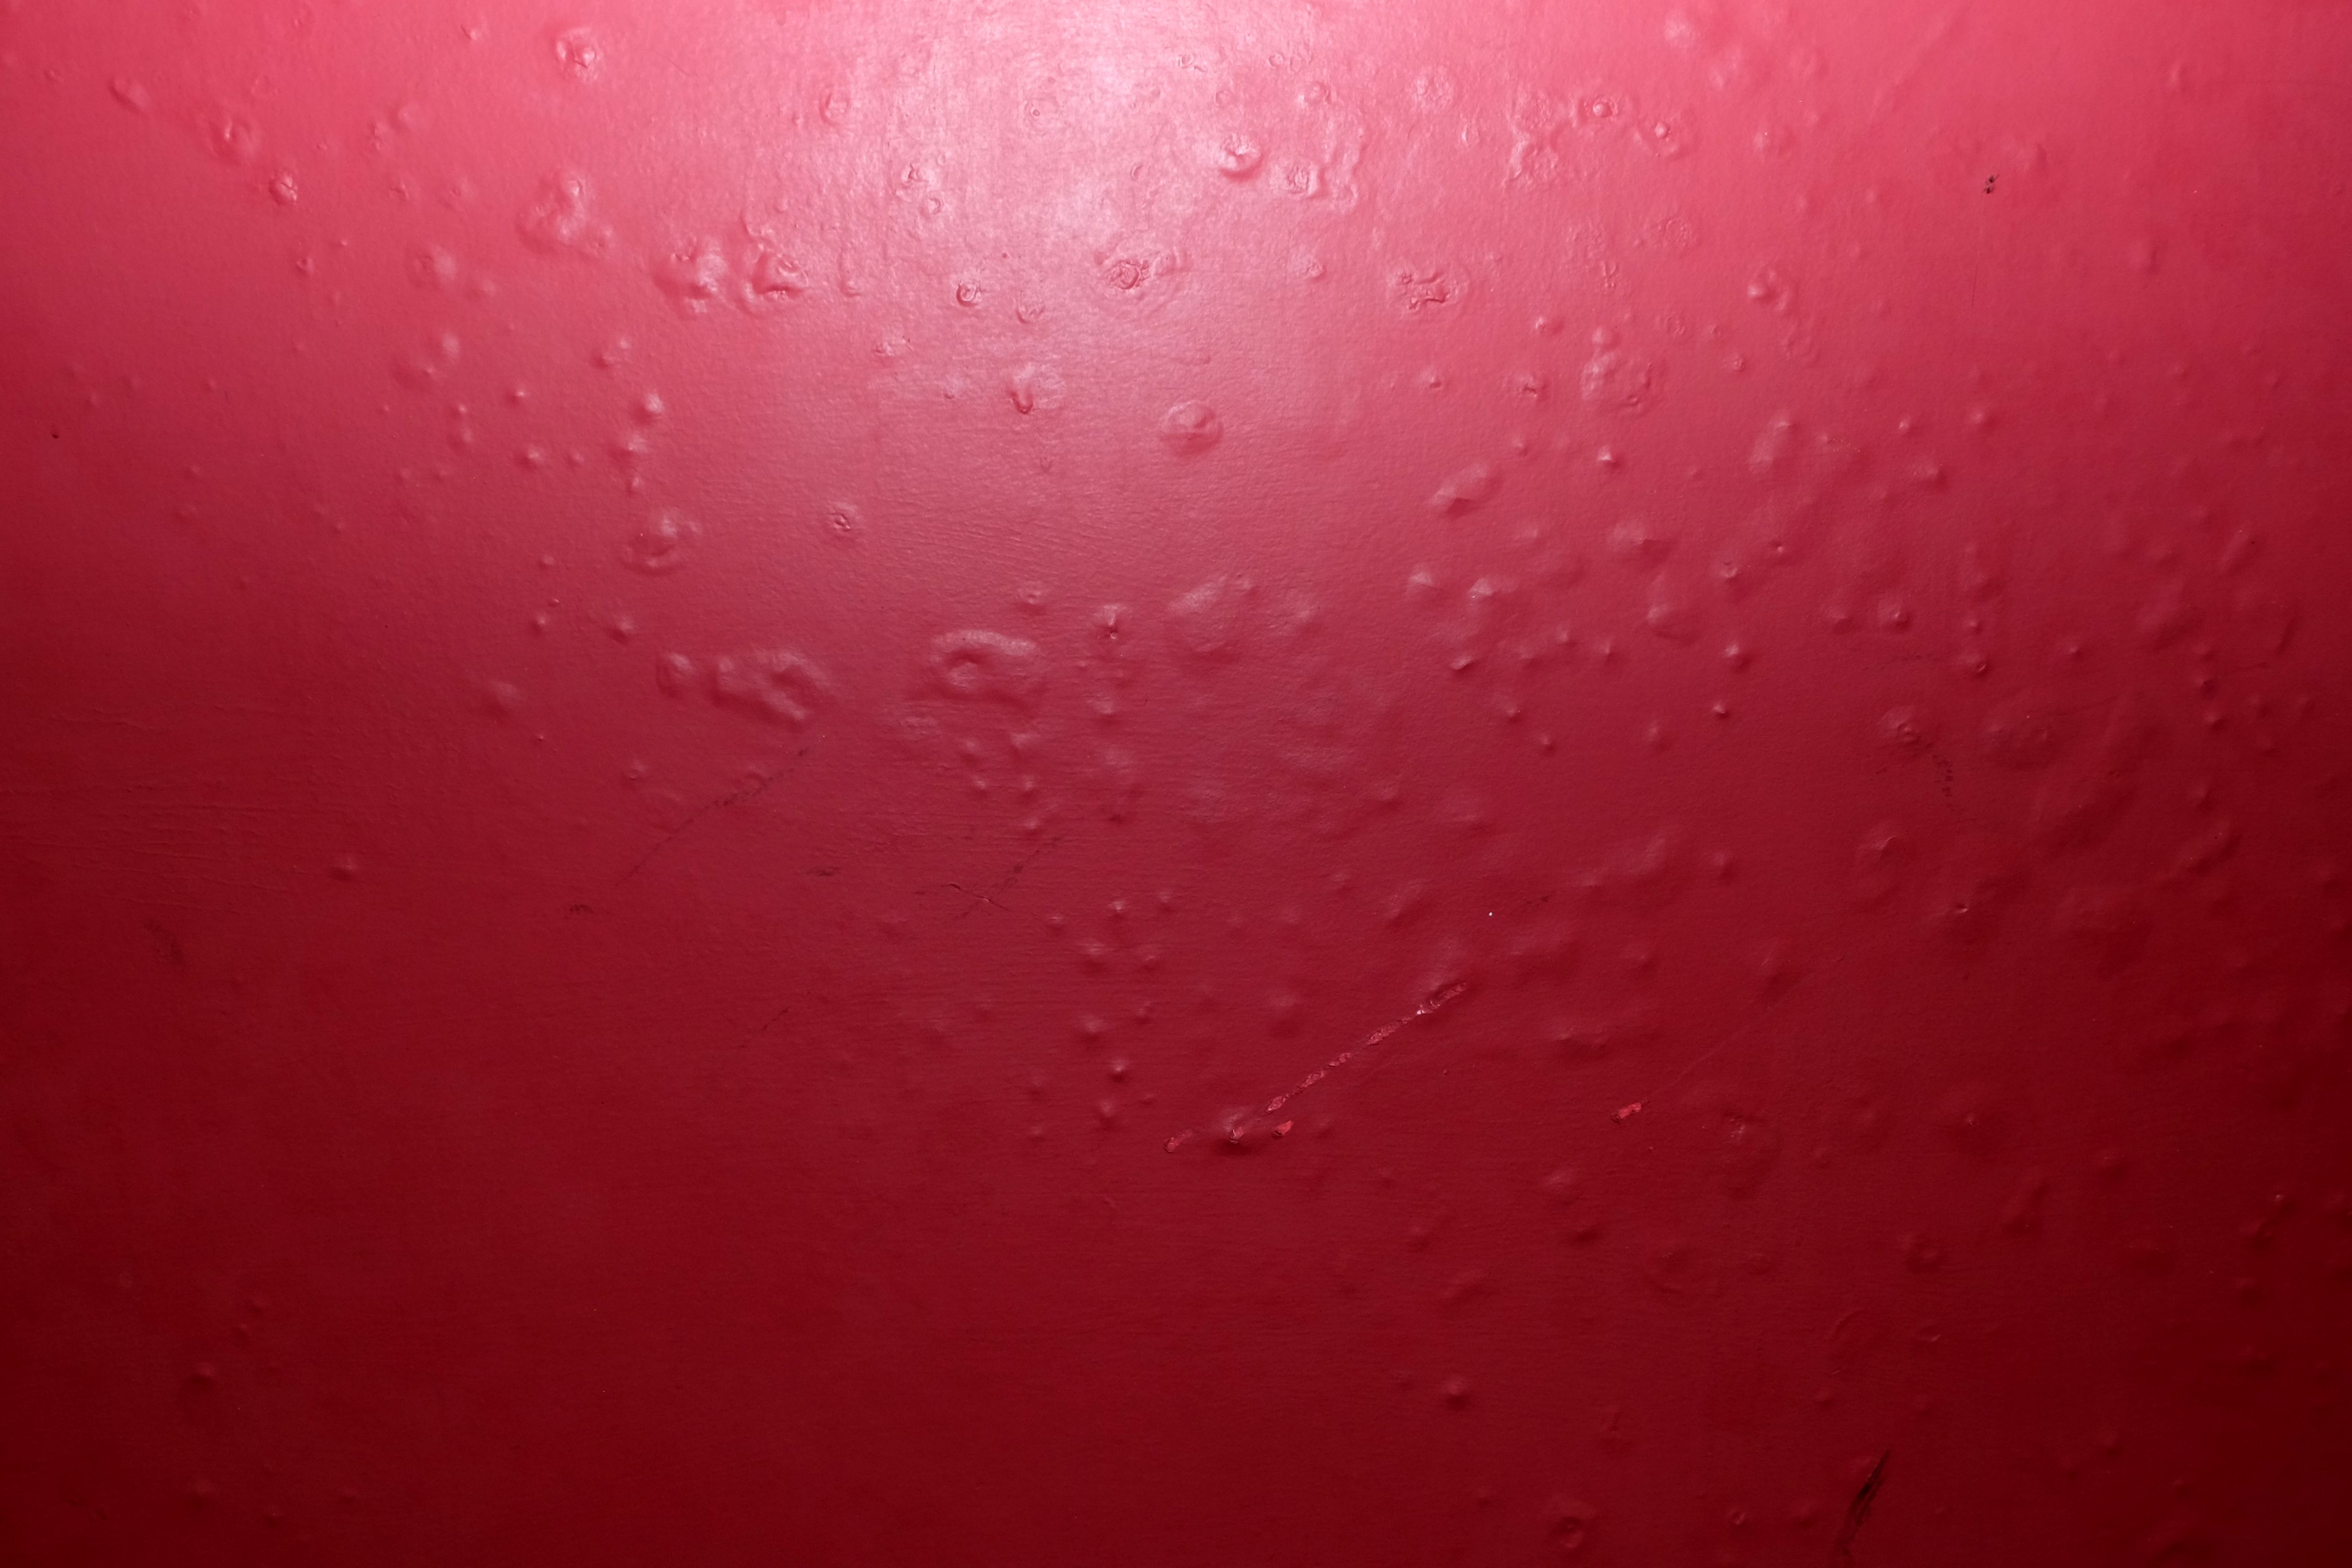
- Blistering: Bubbles forming under the coating due to moisture or solvent entrapment.
- Cracking: Splits in the coating caused by excessive thickness or substrate movement.
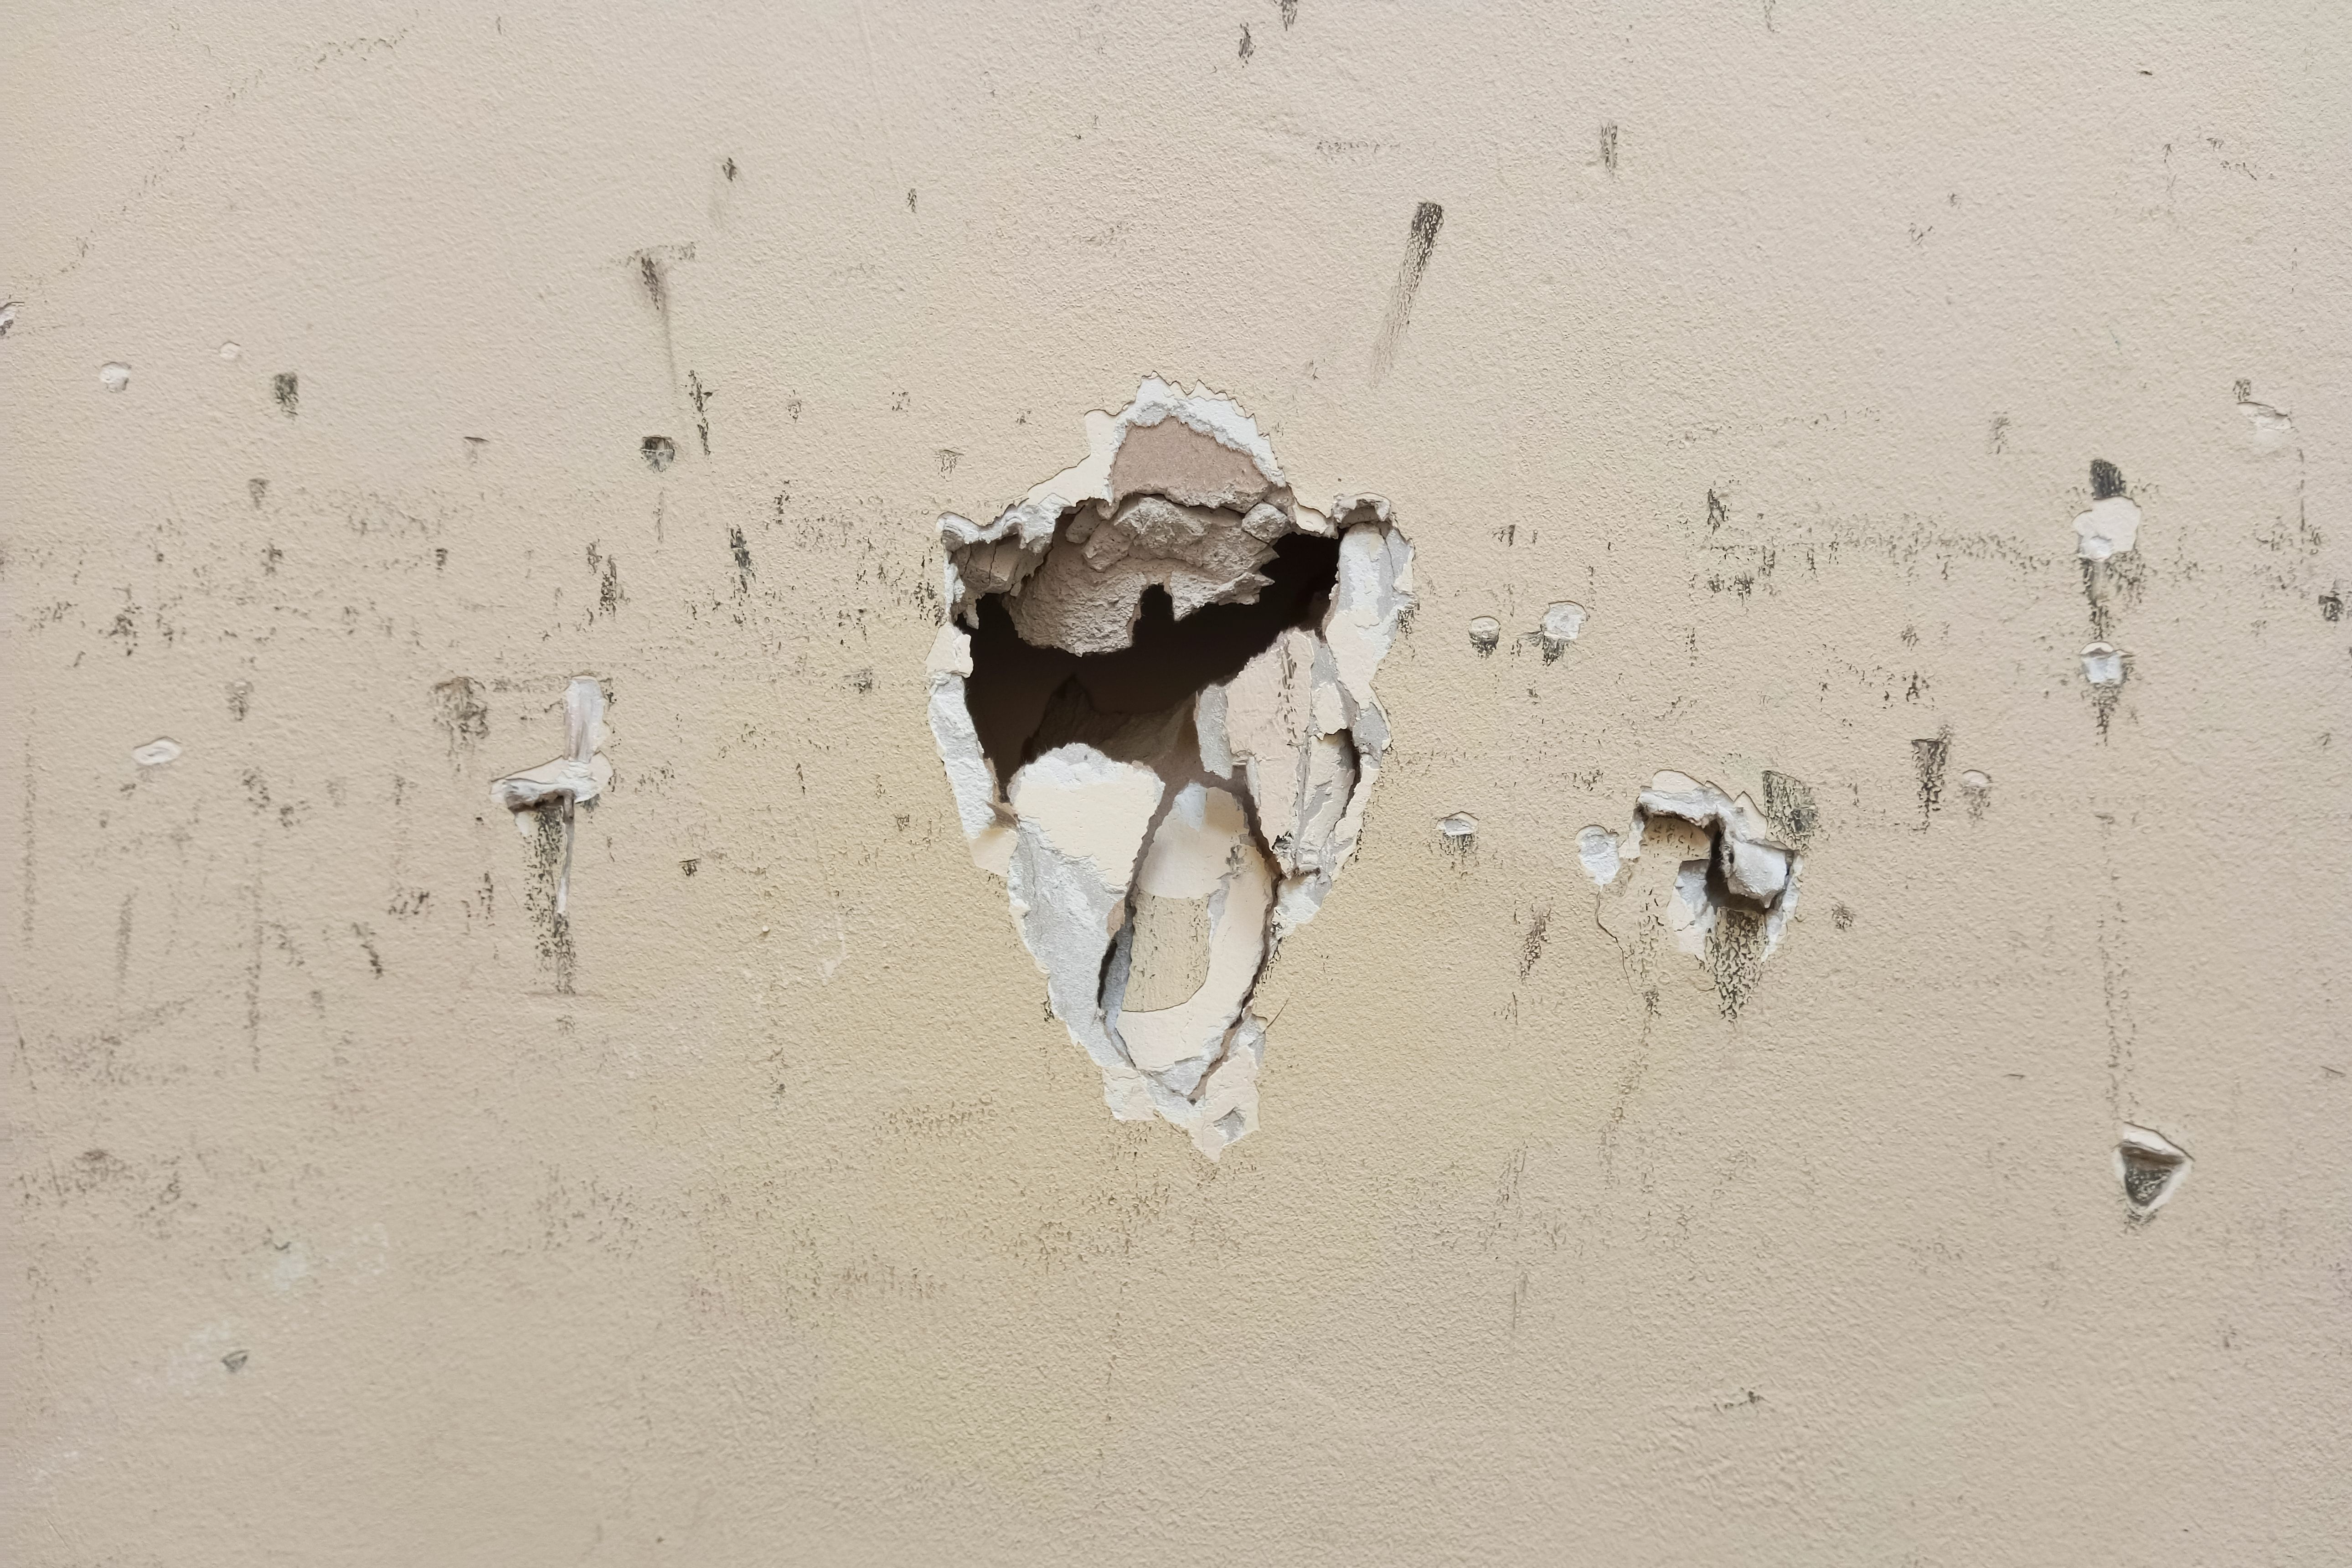
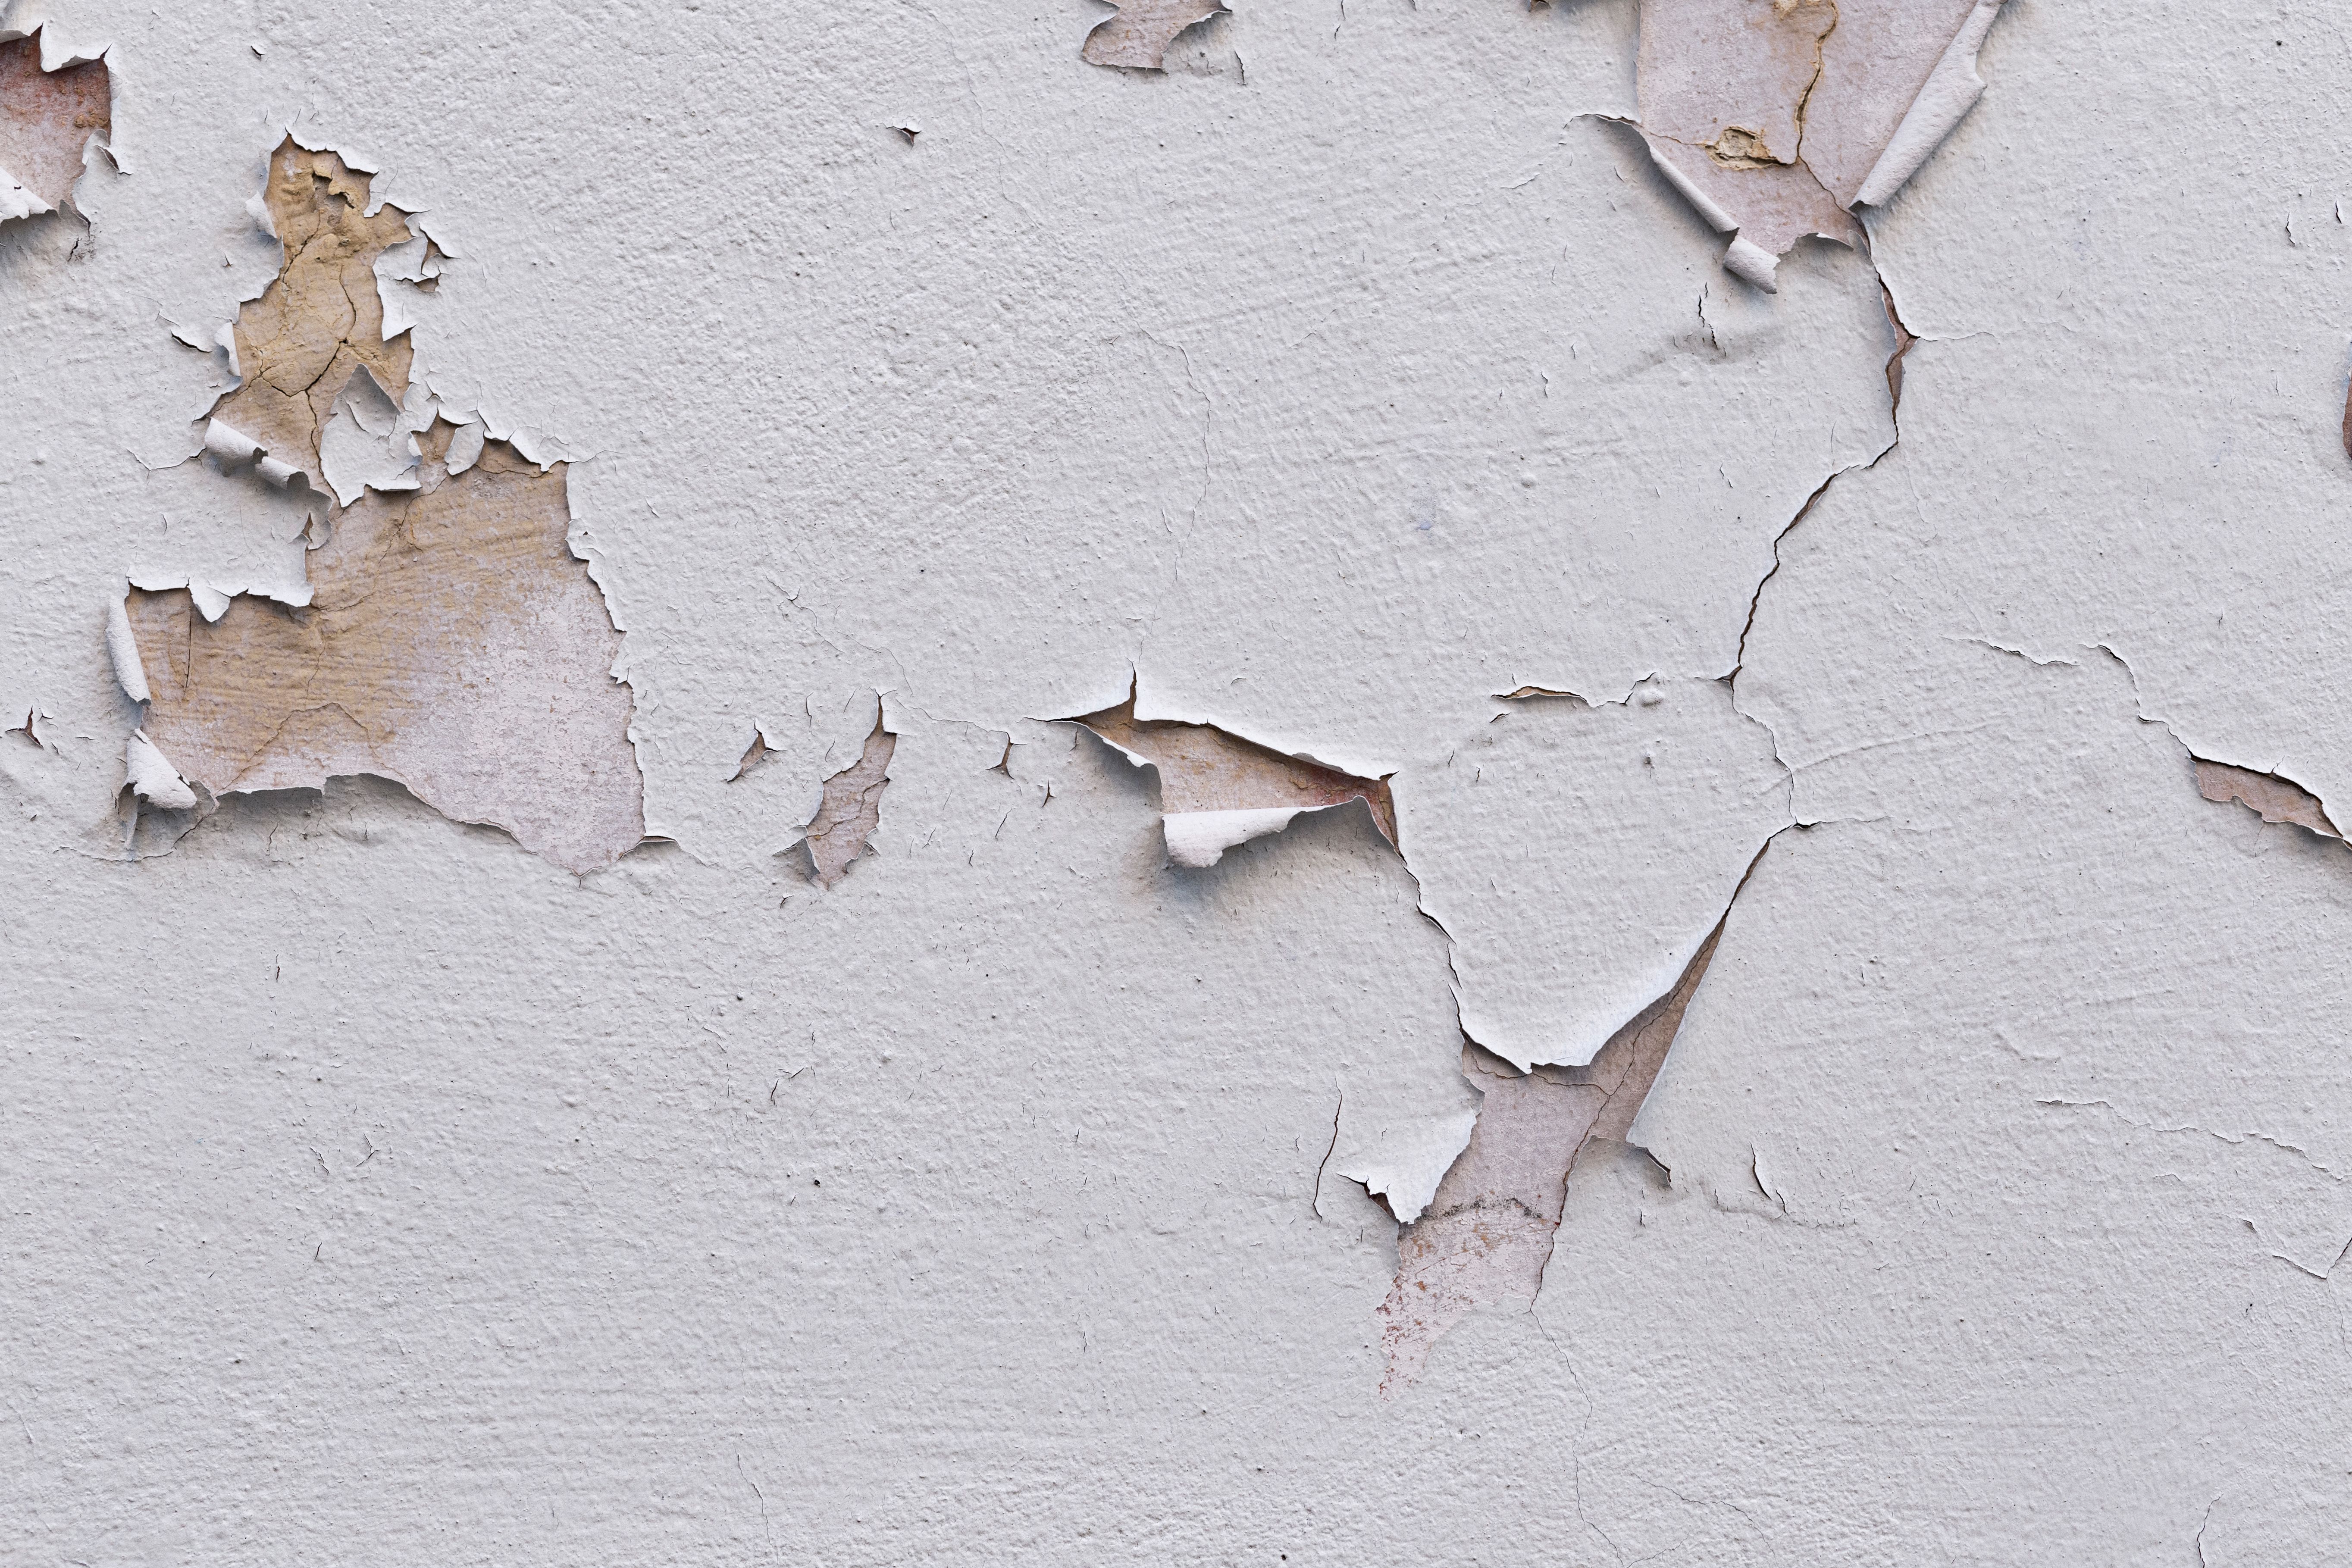
- Peeling: The coating detaches from the surface due to poor adhesion or surface contamination.
Identifying Blistering
Blistering appears as raised bubbles or blisters on the coating surface. This defect often results from moisture trapped beneath the coating or exposure to extreme temperatures. To prevent blistering, ensure the surface is dry and apply the coating in suitable weather conditions.
Recognizing Cracking
Cracking manifests as visible splits or fissures in the coating. This issue can arise from applying too thick a layer of coating or insufficient flexibility in the material. To avoid cracking, apply thinner layers and use flexible coatings for surfaces prone to movement.
Preventing Peeling
Peeling occurs when the coating loses adhesion and detaches from the surface. This defect can be due to inadequate surface preparation or contamination. Ensure the surface is clean and primed properly before applying the coating to prevent peeling.
DIY Tips for Fixing Coating Defects
Addressing coating defects involves several steps:
- Identify the defect: Examine the surface to determine the type and extent of the defect.
- Remove the affected coating: Use sandpaper or a scraper to remove the defective coating layer.
- Prepare the surface: Clean and prime the surface to ensure proper adhesion.
- Reapply the coating: Follow manufacturer instructions for the best results.
Conclusion
By understanding and identifying common coating defects, you can enhance the longevity and appearance of your projects. Proper surface preparation, application techniques, and environmental considerations are crucial to avoiding these issues. With this DIY guide, you'll be better equipped to tackle any coating challenges that come your way.